今天逆战发布新版了。我做的新军衔系统和转生系统在这次上线了。哈哈,好有成就感。第一次写的代码能够影响这么多人的生活。听说玩家都挤在主城转生NPC处了。

新军衔系统:

转生系统:

在逆战的界面开发中,一般只需要从uc往flash中单向传输数据,因此这里只总结从uc->flash的数据流动方法。flash->uc的数据流动,其实有相对应的方式,比如SetVariableBool函数有对应的GetVariableBool函数。

在unrealscript中,使用scaleform的界面类,都继承自GfxMoviePlayer。

一、传输变量

native function SetVariableString(string path, string s);

native function SetVariableBool(string path, bool b);

native function SetVariableNumber(string path, float f);

我在GfxUIMovie中没找到专门设置int的函数,估计可以用SetVariableNumber替代。关键是理解path的设置,比如对应flash文件的名称是ReBornGuide。那么path可能是ReBornGuide.str或者_root.ReBornGuide.str,具体跟ue3项目的一些设置有关。

这几个函数对应的cpp声明如下:

String:SetVariableString(const FString path, const FString s);

Bool:SetVariableBool(const FString path, UBool b);

Float:SetVariableNumber(const FString path, float f);

有趣的是,这几个函数的字符串参数都是引用,这样恰恰说明了在uc中,字符串是引用类型。

例子:

1
2
3
4
5
6
test.uc中:
String strTest = "测试";
String path = "_root.TestFlash.strTest";
SetVariableString(path,strTest);
TestFlash.as中:
var strTest:String;

二、传输数组

native function bool SetVariableStringArray(string path, int index, array Arg);

native function bool SetVariableFloatArray(string path, int index, array Arg);

native function bool SetVariableIntArray(string path, int index, array Arg);

其对应的cpp实现

String:SetVariableStringArray(const FString path, INT Index,const TArray arg);

Float:SetVariableFloatArray(const FString path, INT Index,const TArray arg);

Int:SetVariableFloatArray(const FString path, INT Index,const TArray arg);

这里Index表示从数组的第几个元素开始,0表示传输全部,arg是要传输的数组。

例子:

1
2
3
4
5
6
7
8
test.uc中:
local array<String> strArray;
strArray.AddItem("0");
strArray.AddItem("1");
String path = "_root.TestFlash.strTest";
SetVariableStringArray(path,strArray);
TestFlash.as中:
var strArray:Array = new Array();

三、传输复合对象(结构体)

当需要传输整体的数据,或者传输多个数据的时候,可以将数据组合成一个结构体。假设在uc中定义了如下结构体,

1
2
3
4
5
6
7
8
9
struct RankData
{
var string Name;
var int Rank;
var double d;
var float f;
var bool b;
};
RankData RD;

我们想将其一次性传入as中定义的Object对象,var RD:Object。这里我们可以使用SetVariableObject函数。其定义如下:

native function SetVariableObject(string path, GFxObject Object);

下面的例子很好说明了如何使用该函数。

1
2
3
4
5
6
7
8
9
10
11
12
13
14
15
16
17
18
19
20
21
22
23
24
25
26
27
28
29
30
31
32
33
34
35
36
37
38
39
40
41
uc中:
struct RankData
{
var string Name;
var int Rank;
var double d;
var float f;
var bool b;
};

function SetFlashVariables()
{
local GFxObject GfxObj;
local RankData RD;
local string path;

RD.Name = "test";
RD.Rank = 1;
RD.d = 1.0;
RD.f = 1.0;
RD.b = True;
GfxObj = CreateObject("Object");
GfxObj.SetString("Name", RD.Name);
GfxObj.SetInt("Rank", RD.Rank);
GfxObj.SetDouble("d", RD.d);
GfxObj.SetFloat("f", RD.f);
GfxObj.SetBool("b", RD.b);

path = "_root.TestFlash.RD"
SetVariableObject(path, GfxObj);
GfxObj.DestroyObject();
}

TestFlash.as中:
var RD:Object = new Object();
//在uc中调用了SetFlashVariables函数后,as中就能获得RD的值。
trace(RD.Name);
trace(RD.Name);
trace(RD.f);
trace(RD.d);
trace(RD.b);

从上面代表可以看出,GFxObject可以代表一个符号变量,可以设置一个GFxObject的多个属性,然后一次性将这个对象传入flash。GFxObject.uc中有如下Set变量的函数:

1
2
3
4
5
6
native final function SetBool(string Member, bool b);
native final function SetFloat(string Member, float f);
native final function SetDouble(string Member,double d);
native final function SetInt(string Member,int i);
native final function SetString(string Member, string s);
native final function SetObject(string Member, GFxObject val);

因此,可以看出可以设置GFxObject各种类型的属性。关键的是还可以设置其GFxObject类型的属性,从而可以嵌套定义。比如结构体中定义另一结构体成员。当需要将多次传输组合为一次时候,也可以使用这种方式,并不需要一定定义结构体。

四、传输结构体数组

假设as中定义如下数组,var RankListDatas:Array = new Array();那么可以用下面代码传输:

1
2
3
4
5
6
7
8
9
10
11
12
13
14
15
16
17
18
19
20
21
22
23
24
25
26
27
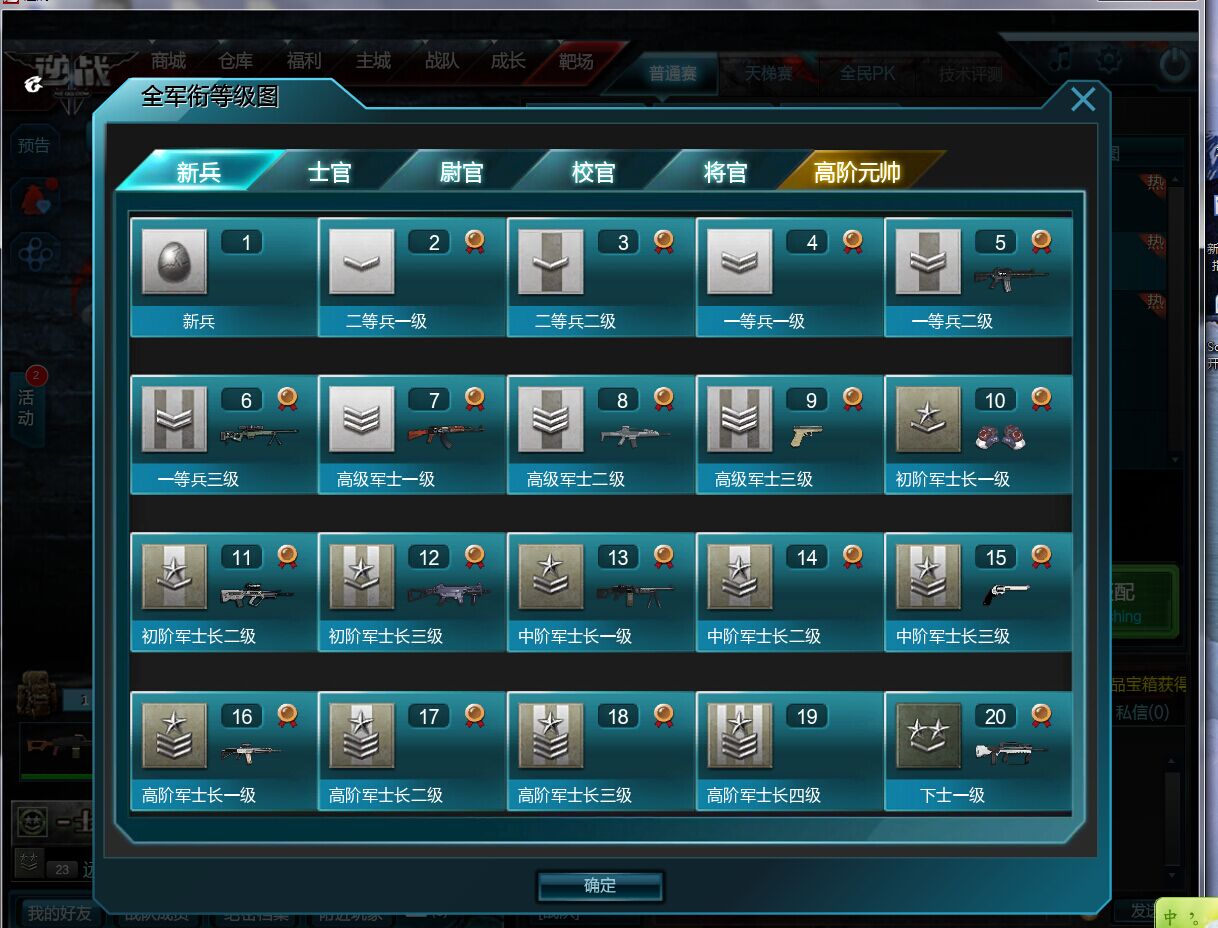
//军衔列表每项的数据
struct RankListData
{
var int Level;//等级
var string Name;//军衔名
};
var array<RankListData> RankListDatas;
var string path;
function SetFlashRankListDatas()
{
local int Index;
local GFxObject GfxRankListDatas;
local GFxObject GfxTempObj;

GfxRankListDatas = CreateArray();
for (Index = 0; Index < RankDatas.Length; Index++)//第0项是多余的
{
GfxTempObj = CreateObject("Object");
GfxTempObj.SetInt("Level", RankListDatas[Index].Level);
GfxTempObj.SetString("Name", RankListDatas[Index].Name);
GfxRankListDatas.SetElementObject(Index, GfxTempObj);
GfxTempObj.DestroyObject();
}

SetVariableObject(path, GfxRankListDatas);
GfxRankListDatas.DestroyObject();
}

从代码里面可以看到,还是用SetVariableObject传输数据。不过,需要用CreateArray()创建GFxObject对象。在as代码中RankListDatas[0].Name就可以访问第一个元素的Name属性了。

GfxRankListDatas.SetElementObject(Index, GfxTempObj)则是将GfxTempObj设置为GfxRankListDatas代表的数组的第Index个元素。

五、传输结构体数组的数组(结构体内部复合结构体数组)

1
2
3
4
5
6
7
8
9
10
11
12
13
14
15
16
17
18
19
20
21
22
23
24
25
26
27
28
29
30
31
32
33
34
35
36
37
38
39
40
41
42
43
44
45
struct AwardData
{
var string IconSource;
};

struct RankAwardData
{
var string RankAwardTitle;
var array<AwardData> AwardDatas;
};
var array<RankAwardData> RankAwardDatas;
var string path;

function SetFlashRankAwardDatas()
{
local int Index;
local int i;
local GFxObject GfxRankAwardDatas;
local GFxObject GfxTempObj;
local GFxObject GfxAwardDatas;
local GFxObject GfxAwardTempObj;

GfxRankAwardDatas = CreateArray();
for (Index = 0; Index < RankAwardDatas.Length; Index++)
{
GfxTempObj = CreateObject("Object");
GfxTempObj.SetString("RankAwardTitle", RankAwardDatas[Index].RankAwardTitle);

GfxAwardDatas = CreateArray();
for (i = 0; i < RankAwardDatas[Index].AwardDatas.Length; ++i)
{
GfxAwardTempObj = CreateObject("Object");
GfxAwardTempObj.SetString("IconSource", RankAwardDatas[Index].AwardDatas[i].IconSource);
GfxAwardDatas.SetElementObject(i, GfxAwardTempObj);
GfxAwardTempObj.DestroyObject();
}
GfxTempObj.SetObject("RankAward", GfxAwardDatas);
GfxRankAwardDatas.SetElementObject(Index, GfxTempObj);
GfxAwardDatas.DestroyObject();
GfxTempObj.DestroyObject();
}

SetVariableObject(path, GfxRankAwardDatas);
GfxRankAwardDatas.DestroyObject();
}

从上面代码可以看出,调用GfxTempObj.SetObject(“RankAward”, GfxAwardDatas)可以设置GFxObject对象的GFxObject属性,从而能够传输复合结构体类型的数组。假设as中对应的数组定义为var RankAwardDatas:Array=new Array();那么,在as代码中RankAwardDatas[0].RankAward.IconSource则能访问该数组第一个元素的结构体成员的IconSource属性。

我不知道现在的win8和win10系统上是不是自动显示tga格式的缩略图的。我的win7系统确实有时候显示不了。为什么有这样的需求了,因为我现在的工作是开发游戏,虽然这几个月在写界面。在网上搜到有一个这样的软件MysticThumbs。这显然是外国友人做的东西,肯定是要注册的,官网上面下载的肯定是的,要交钱的。伟大的天朝人民肯定有破解版本了。

下面分享下我下载到的破解版本,里面有使用说明,MysticThumbs破解版本。虽然说里面有破解说明,既然写了这篇文章,我就是想更简略的说明下如何使用。

1.打开之后,直接运行MysticThumbs3.0.0.Multi+Pt FULL。假设安装到默认路径。

2.打开安装路径C:\Program Files\MysticCoder\MysticThumbs,你会看到里面有几个dll。

3.把安装文件里面的patch目录下的文件,复制到2所在的目录即可。

破解完毕,现在不用担心使用一个月后失效了。

这个破解版本在2个多月后失效了,慎用。

7月26号封闭培训,到部门来已经是8月10号了。刚开始懵懵懂懂的,不知道干啥。部门上课的那几天,把新人手册的步骤做了一遍。悲伤的是,做完之后不少忘记了。编译脚本的addin插件至今没有显示出来,虽然有几天它显示过。除此之外,还有不少纠结过的问题。让我一一道来吧。配置vs字体和颜色,va快捷键,查找快捷键无效,F12查看定义无效,uc断点无效,调试uc时候游戏进程掉了。。。下面来说说成功解决掉的几个问题吧,非常感谢jerry哥和vivin姐的帮忙。

1.vs的字体和颜色。默认字体是新宋体,这个字体据说不是很好,推荐consolas字体。颜色的话,有个网站叫做https://studiostyl.es/
可以去里面选自己喜欢的风格,设置好就行。值得注意的是,安装nfringe后,字体颜色设置面板里面会出现unrealscript相关的设置,注意修改。
如图所示,

另一个需要注意的地方是,与.uc文件不同,.cpp中的代码颜色是在visual assist x中修改的,这个我找了半天才反应过来。

2.visaul assist x的open file in solution快捷键shift+alt+o没掉了,按这个快捷键打开的一个网页模板窗口。方式是配置一个新的快捷键。tools->options->environment->keyboard,打开面板后选中VAssistX.OpenFileInSolutionDialog。再将鼠标焦点切换到Press shortcut keys下面的输入框里面,按下shift+alt+o,就添加一个全局快捷键,点击assign按钮即可。如图,

3.vs的查找文件快捷键,shift+ctrl+f无效。这是因为安装了搜狗输入法造成了。搜狗输入法在更上层截断了这个快捷键,设置下搜狗输入法取消这个快捷键即可。如图,

4.调试uc时候游戏进程脱离vs。这个debug->attach to process即可。注意最上面的tansport可以筛选unrealscript,筛选后再用下面的refresh按钮刷新一下就出来了。

5.f12查找代码定义的问题并没有彻底解决。在uc文件中,只能用f12查找定义。对于f12失效的情况下,使用3在整个解决方案搜索,不过比较麻烦,但是能解决问题。在cpp文件中,就能够使用va的快捷键alt+g查找定义了。我居然忘记了这茬,以前从没接触过脚本编写,现在项目里面cpp和uc都有,所以混淆了。

6.uc断点无效,据说是nfringe的bug。

7.另外项目组的addin插件一直点击没反应,也不知道原因。不过,我在解决问题3之后,addin插件按钮点击后不会造成vs崩溃,但是还是无效的,也就是彻底没反应,我是服了。。。不过,今天前辈在我机子上面调试那个插件的代码,修复了bug,可以使用了,开心。。。

早上悲催的被发现昨晚上传代码没传全,差点请全组喝饮料了。。。

vector是一直在用的东西,太常用了,数组的替代品。大多数时候,都想不出理由不用vector,改用list,deque之类的。从功能来看,vector就是一个动态的数组而已。使用vector时候,唯一需要注意的是,当重新申请更大空间时候,是去了一块新内存,而不是直接在原地址增加,所有迭代器是都会失效的。当然还有其它操作造成某些迭代器失效。

下面来看看vector的部分定义。全部定义过于冗长了。

1
2
3
4
5
6
7
8
9
10
11
12
13
14
15
16
17
18
19
20
21
22
23
24
25
26
27
28
29
30
31
32
33
34
35
36
37
38
39
40
41
42
43
44
45
46
47
48
49
50
51
52
53
54
55
56
57
58
59
60
61
62
63
64
65
66
67
68
69
70
71
72
73
74
75
76
77
78
79
80
81
82
83
84
85
86
87
88
89
90
91
92
93
94
95
96
97
98
99
100
101
102
103
104
105
106
107
108
109
110
111
112
113
114
115
116
117
118
119
120
121
122
123
124
125
126
127
128
129
130
131
132
133
134
135
136
137
138
139
140
141
142
143
144
145
146
147
148
149
150
151
152
template <class T, class Alloc = alloc>  // 預設使用 alloc 為配置器
class vector {
public:
// 以下標示 (1),(2),(3),(4),(5),代表 iterator_traits<I> 所服務的5個型別。
typedef T value_type; // (1)
typedef value_type* pointer; // (2)
typedef const value_type* const_pointer;
typedef const value_type* const_iterator;
typedef value_type reference; // (3)
typedef const value_type const_reference;
typedef size_t size_type;
typedef ptrdiff_t difference_type; // (4)
// 以下,由於vector 所維護的是一個連續線性空間,所以不論其元素型別為何,
// 原生指標都可以做為其迭代器而滿足所有需求。
typedef value_type* iterator;

protected:
// 專屬之空間配置器,每次配置一個元素大小
typedef simple_alloc<value_type, Alloc> data_allocator;

// vector採用簡單的線性連續空間。以兩個迭代器start和end分別指向頭尾,
// 並以迭代器end_of_storage指向容量尾端。容量可能比(尾-頭)還大,
// 多餘即備用空間。
iterator start;
iterator finish;
iterator end_of_storage;

void insert_aux(iterator position, const T x);
void deallocate() {
if (start)
data_allocator::deallocate(start, end_of_storage - start);
}

void fill_initialize(size_type n, const T value) {
start = allocate_and_fill(n, value); // 配置空間並設初值
finish = start + n; // 調整水位
end_of_storage = finish; // 調整水位
}

public:
iterator begin() { return start; }
const_iterator begin() const { return start; }
iterator end() { return finish; }
const_iterator end() const { return finish; }
reverse_iterator rbegin() { return reverse_iterator(end()); }
const_reverse_iterator rbegin() const {
return const_reverse_iterator(end());
}
reverse_iterator rend() { return reverse_iterator(begin()); }
const_reverse_iterator rend() const {
return const_reverse_iterator(begin());
}
size_type size() const { return size_type(end() - begin()); }
size_type max_size() const { return size_type(-1) / sizeof(T); }
size_type capacity() const { return size_type(end_of_storage - begin()); }
bool empty() const { return begin() == end(); }
reference operator[](size_type n) { return *(begin() + n); }
const_reference operator[](size_type n) const { return *(begin() + n); }

vector() : start(0), finish(0), end_of_storage(0) {}
// 以下建構式,允許指定大小 n 和初值 value
vector(size_type n, const T value) { fill_initialize(n, value); }
vector(int n, const T value) { fill_initialize(n, value); }
vector(long n, const T value) { fill_initialize(n, value); }
explicit vector(size_type n) { fill_initialize(n, T()); }

vector(const vector<T, Alloc> x) {
start = allocate_and_copy(x.end() - x.begin(), x.begin(), x.end());
finish = start + (x.end() - x.begin());
end_of_storage = finish;
}

vector(const_iterator first, const_iterator last) {
size_type n = 0;
distance(first, last, n);
start = allocate_and_copy(n, first, last);
finish = start + n;
end_of_storage = finish;
}

~vector() {
destroy(start, finish); // 全域函式,建構/解構基本工具。
deallocate(); // 先前定義好的成員函式
}
vector<T, Alloc> operator=(const vector<T, Alloc> x);
void reserve(size_type n) {
if (capacity() < n) {
const size_type old_size = size();
iterator tmp = allocate_and_copy(n, start, finish);
destroy(start, finish);
deallocate();
start = tmp;
finish = tmp + old_size;
end_of_storage = start + n;
}
}

// 取出第一個元素內容
reference front() { return *begin(); }
const_reference front() const { return *begin(); }
// 取出最後一個元素內容
reference back() { return *(end() - 1); }
const_reference back() const { return *(end() - 1); }
// 增加一個元素,做為最後元素
void push_back(const T x) {
if (finish != end_of_storage) { // 還有備用空間
construct(finish, x); // 直接在備用空間中建構元素。
++finish; // 調整水位高度
}
else // 已無備用空間
insert_aux(end(), x);
}

void pop_back() {
--finish;
destroy(finish); // 全域函式,建構/解構基本工具。
}
// 將迭代器 position 所指之元素移除
iterator erase(iterator position) {
if (position + 1 != end()) // 如果 p 不是指向最後一個元素
// 將 p 之後的元素一一向前遞移
copy(position + 1, finish, position);

--finish; // 調整水位
destroy(finish); // 全域函式,建構/解構基本工具。
return position;
}
iterator erase(iterator first, iterator last) {
iterator i = copy(last, finish, first);
destroy(i, finish); // 全域函式,建構/解構基本工具。
finish = finish - (last - first);
return first;
}
void resize(size_type new_size, const T x) {
if (new_size < size())
erase(begin() + new_size, end());
else
insert(end(), new_size - size(), x);
}
void resize(size_type new_size) { resize(new_size, T()); }
// 清除全部元素。注意,並未釋放空間,以備可能未來還會新加入元素。
void clear() { erase(begin(), end()); }

protected:
iterator allocate_and_fill(size_type n, const T x) {
iterator result = data_allocator::allocate(n); // 配置n個元素空間
// 全域函式,記憶體低階工具,將result所指之未初始化空間設定初值為 x,n個
// 定義於 <stl_uninitialized.h>。
uninitialized_fill_n(result, n, x);
return result;
}
}

下面分几部分来讲述vector的定义。首先,模板参数一个是类型T作为vector的内含物类型,class Alloc = alloc则是使用默认的内存申请器。这一句typedef simple_alloc data_allocator;则是重定义相应的内存申请器类型。
然后,vector的迭代器类型其实就是原始的指针类型重定义了一下。以下这几句重定义,

1
2
3
4
5
6
7
8
typedef T value_type;             // (1)
typedef value_type* pointer; // (2)
typedef const value_type* const_pointer;
typedef const value_type* const_iterator;
typedef value_type reference; // (3)
typedef const value_type const_reference;
typedef size_t size_type;
typedef ptrdiff_t difference_type; // (4)

在list,deque,map,set等支持迭代器操作的容器定义中都会出现。其中,vector中的定义是最简单的。每个容器都有值类型,指针类型,迭代器类型,引用类型,以及大小类型,difference_type。知道这些后,写代码时候,可以避免一些错误,或者说代码更规范,就能自然而然的使用容易内置类型,比如vector::size_type而不是int来进行一些操作。原始指针支持随机存储,因此vector的迭代器就是功能最强的随机迭代器。
vector采用的数据结构很简单,就是一段线性内存。不过,有三个指针分别指向内存的头,已使用的尾部,尾。为了避免过多的重新分配内存,vector的容量永远比大小大,而且每次重新配置内存,大小翻倍。所以,vector的很多操作,比如,begin,end,front,back,size等的实现就很直观了,具体参看源码。下图很清楚的说明了这一情况。

接着要讲的是vector如何管理空间的。先看下面三个函数,

1
2
3
4
5
6
7
8
9
10
11
12
13
vector(size_type n, const T value) { fill_initialize(n, value); }
void fill_initialize(size_type n, const T value) {
start = allocate_and_fill(n, value); // 配置空間並設初值
finish = start + n; // 調整水位
end_of_storage = finish; // 調整水位
}
iterator allocate_and_fill(size_type n, const T x) {
iterator result = data_allocator::allocate(n); // 配置n個元素空間
// 全域函式,記憶體低階工具,將result所指之未初始化空間設定初值為 x,n個
// 定義於 <stl_uninitialized.h>。
uninitialized_fill_n(result, n, x);
return result;
}

从源码中可以看出,最终都调用了函数uninitialized_fill_n初始化数据。这个stl的全局函数保证申请内存时候不会调用构造函数做额外的事情,也就是申请内存后,再用数据初始化。下面再看看其余几个操作。

1
2
3
4
5
6
7
8
9
10
11
12
13
14
15
16
17
18
19
20
21
22
23
24
25
26
27
28
29
void push_back(const T x) {
if (finish != end_of_storage) { // 還有備用空間
construct(finish, x); // 直接在備用空間中建構元素。
++finish; // 調整水位高度
}
else // 已無備用空間
insert_aux(end(), x);
}

void pop_back() {
--finish;
destroy(finish); // 全域函式,建構/解構基本工具。
}
// 將迭代器 position 所指之元素移除
iterator erase(iterator position) {
if (position + 1 != end()) // 如果 p 不是指向最後一個元素
// 將 p 之後的元素一一向前遞移
copy(position + 1, finish, position);

--finish; // 調整水位
destroy(finish); // 全域函式,建構/解構基本工具。
return position;
}
iterator erase(iterator first, iterator last) {
iterator i = copy(last, finish, first);
destroy(i, finish); // 全域函式,建構/解構基本工具。
finish = finish - (last - first);
return first;
}

push_back在还有空间的情况下,也只需要调用construct函数构造数据,否则就需要调用insert_aux申请新的内存,再添加数据了。pop_back相对就简单很多。erase函数也涉及到一些移动内存块的操作,思路基本是先移动内存,然后把末尾多出来的数据析构掉(调用destroy函数)。

很久没更新博客了。额,一直想写这个来着。记得以前写过绘制三维标量场的文章,方法是找的渐变颜色纹理图片,然后用一维纹理坐标映射贴上去的。后面发现根本不需要去找图片,这种渐变色本来就是一种颜色空间的定义。请看hsv颜色模型,这种颜色模型类似于rgb,也是三个分量h(色调),s(饱和度),v(亮度)。h表示的绕圆锥的一周,也就是纯颜色的渐变,正是我们需要的东西。s表示从圆心到圆边缘的半径,0-1的范围,表示颜色纯度。v则是垂直的轴,表示亮度。如下图,我们要的就是绕圈一周的颜色渐变。

总体思路就是数值0-1,映射到hsv颜色空间的(0-360,1,255)。实现标量场的方法是,首先,将hsv的(0-360,1,255)转换为rgb,保存为一维数组。以该数组为数据,生成一维纹理,数值0-1作为纹理坐标,再贴图即可生成标量场。下面是用该方法生成标量场的相关代码。首先是构造一维纹理数组,然后用其生成1d纹理。

1
2
3
4
5
6
7
8
9
10
11
12
13
14
15
16
17
18
19
20
21
22
23
24
25
26
27
28
29
30
31
int CTexture::BuildColorMapTexture()
{
const int COLOR_SIZE = 240;//红到蓝
ImageRGBA colorMap(COLOR_SIZE, 1);

for (int i = 0; i < COLOR_SIZE; ++i)
{
colorMap.pixel(i, 0) = Hsv2Rgb(i, 1, 255);
}

glPixelStorei(GL_UNPACK_ALIGNMENT, 1);
glGenTextures(1, m_uTexName);
glBindTexture(GL_TEXTURE_1D, m_uTexName);

glTexParameteri(GL_TEXTURE_1D, GL_TEXTURE_WRAP_S, GL_REPEAT);
glTexParameteri(GL_TEXTURE_1D, GL_TEXTURE_WRAP_T, GL_REPEAT);
glTexParameteri(GL_TEXTURE_1D, GL_TEXTURE_MAG_FILTER, GL_LINEAR);
glTexParameteri(GL_TEXTURE_1D, GL_TEXTURE_MIN_FILTER, GL_LINEAR_MIPMAP_NEAREST);
glTexEnvf(GL_TEXTURE_ENV, GL_TEXTURE_ENV_MODE, GL_REPLACE);

//生成2d的Mipmap纹理
int nRet = gluBuild1DMipmaps(GL_TEXTURE_1D, 4, COLOR_SIZE, GL_RGBA, GL_UNSIGNED_BYTE,
colorMap.raw());

if (nRet != 0)
{
return 0;
}

return 1;
}

hsv2rgb的代码如下,从网上可以随便找个修改。

1
2
3
4
5
6
7
8
9
10
11
12
13
14
15
16
17
18
19
20
21
22
23
24
25
26
27
28
29
30
31
32
33
34
35
36
37
38
39
40
41
42
43
44
45
46
47
48
49
50
51
52
53
54
55
56
PixelRGBA Hsv2Rgb(float H, float S, float V)
{
float R, G, B;

int i;
float f, p, q, t;
if(S == 0)
{
// achromatic (grey)
R = G = B = V;
return V4B(R, G, B, 255);
}

H /= 60; // sector 0 to 5
i = floor( H );
f = H - i; // factorial part of h
p = V * ( 1 - S );
q = V * ( 1 - S * f );
t = V * ( 1 - S * ( 1 - f ) );

switch( i )
{
case 0:
R = V;
G = t;
B = p;
break;
case 1:
R = q;
G = V;
B = p;
break;
case 2:
R = p;
G = V;
B = t;
break;
case 3:
R = p;
G = q;
B = V;
break;
case 4:
R = t;
G = p;
B = V;
break;
default: // case 5:
R = V;
G = p;
B = q;
break;
}

return V4B(R, G, B, 255);
}

剩下的事情就是使用BuildColorMapTexture生成1d纹理,然后将数值作为1d纹理坐标设置好就行了。下面是相关的效果图:

颜色空间转换生成纹理:

渐变纹理贴图:

不同的方法效果有区别,原因可能是贴图的数据更精细,而且同一范围比如0-0.3对应的颜色就可能不一致。马上要毕业了,工作内容是游戏开发,以后估计不会再更新读研期间类似的文章的了。

很久没骑这么远了。第一次骑三天都不知道是怎么坚持过来的。总的感觉,身体比去年好太多了。虽然脚累,但是呼吸完全不乱,完全不会心累。中午吃错东西了,一开始就来个闹肚子、过敏。我对某种食物强过敏,当时就在为自己生命安全思考了。本打算骑到附近的梅溪湖算了,但是吹了下风,觉得过敏消散了,就坚持走走看吧。

雷锋大道真的好远,从河西走完整个望城。经过去年的洗心禅寺,发现好近额。为啥去年我走这么点距离会觉得好累了。有些改变确实在不知不觉。不管是身,还是心。永远健康充满活力的身体,是追寻幸福的必要条件。

最后,附图一张。

排序的重要性就不用说了。stl里面的很多容器都是自序的,比如set和map,从begin到end就是一个顺序,毕竟最基本的概念就是一颗搜索树。另外,stack、queue、priority_queue的顺序也是内部实现决定的,不用多说了。list则不支持随机迭代器,内部也提供sort函数。所以,stl里面的sort泛型算法针对的是vector,deque,原生数组之类的数据。正常情况下,用的最多的也就是vector了。

插入排序和快速排序大家都知道是什么。但是,stl里面的sort并不仅仅是一个快速排序,而是一个复杂的组合体,有人把它叫做intro_sort。下面说一下introsort的几点要点。

1> 递归层次的限制,超过一定层次直接堆排序剩余数据。

2> 数据长度小于一定值,直接返回,不继续排序。

3>递归结束后,得到多段相互之间有序的数据(段内部无序),再进行一次优化的插入排序。

4>轴元素选取采用三点取中法,以避免分割不均。

sort的代码如下:

1
2
3
4
5
6
7
template <class RandomAccessIterator>
inline void sort(RandomAccessIterator first, RandomAccessIterator last) {
if (first != last) {
__introsort_loop(first, last, value_type(first), __lg(last - first) * 2);
__final_insertion_sort(first, last);
}
}

从代码中可以看到,sort内部调用的是introsort_loop排序得到多段互相之间有序的小段,再进行插入排序。其中,lg是计算递归层次,定义如下:

1
2
3
4
5
6
7
// 找出 2^k <= n 的最大值k。例,n=7,得k=2,n=20,得k=4,n=8,得k=3。
template <class Size>
inline Size __lg(Size n) {
Size k;
for (k = 0; n > 1; n >>= 1) ++k;
return k;
}

因此,可以看出长度为64的数据,其递归层次不能超过16。如果超过,则进行堆排序。__introsort_loop的代码如下,是整个算法的关键。

1
2
3
4
5
6
7
8
9
10
11
12
13
14
15
16
17
18
19
20
21
22
23
24
template <class RandomAccessIterator, class T, class Size>
void __introsort_loop(RandomAccessIterator first,
RandomAccessIterator last, T*,
Size depth_limit) {
// 以下,__stl_threshold 是個全域常數,稍早定義為 const int 16。
while (last - first > __stl_threshold) {
if (depth_limit == 0) { // 至此,切割惡化
partial_sort(first, last, last); // 改用 heapsort
return;
}
--depth_limit;
// 以下是 median-of-three partition,選擇一個夠好的樞軸並決定切割點。
// 切割點將落在迭代器 cut 身上。
RandomAccessIterator cut = __unguarded_partition
(first, last, T(__median(*first, *(first + (last - first)/2),
*(last - 1))));
// 對右半段遞迴進行 sort.
__introsort_loop(cut, last, value_type(first), depth_limit);
last = cut;
// 現在回到while 迴圈,準備對左半段遞迴進行 sort.
// 這種寫法可讀性較差,效率並沒有比較好。
// RW STL 採用一般教科書寫法(直觀地對左半段和右半段遞迴),較易閱讀。
}
}

从代码里面可以看出,stl里面定义了个常数stl_threshold决定要不要继续循环,如果数据的长度比该值小,那么就不继续递归排序了,除非是调用了堆排,长度小于stl_threshold的段是没有经过排序的。当层次耗尽,depth_limit为0,直接调用partial_sort堆排序返回。另外的部分,就是采用三点取中法决定轴元素。还有这个代码写成了类似尾递归的形式,与教科书上不一致,较难阅读和理解。
__median的代码如下,容易理解。

1
2
3
4
5
6
7
8
9
10
11
12
13
14
15
16
template <class T>
inline const T __median(const T a, const T b, const T c) {
if (a < b)
if (b < c) // a < b < c
return b;
else if (a < c) // a < b, b >= c, a < c
return c;
else
return a;
else if (a < c) // c > a >= b
return a;
else if (b < c) // a >= b, a >= c, b < c
return c;
else
return b;
}

__unguarded_partition与教科书上的partion实现不同,实现简单而且高效。其代码如下:

1
2
3
4
5
6
7
8
9
10
11
12
13
14
15
template <class RandomAccessIterator, class T>
RandomAccessIterator __unguarded_partition(RandomAccessIterator first,
RandomAccessIterator last,
T pivot) {
while (true) {

while (*first < pivot) ++first; // first 找到 >= pivot 的元素,就停下來
--last; // 調整
while (pivot < *last) --last; // last 找到 <= pivot 的元素,就停下來
// 注意,以下first < last 判斷動作,只適用於random iterator
if (!(first < last)) return first; // 交錯,結束迴圈。
iter_swap(first, last); // 大小值交換
++first; // 調整
}
}

现在回到sort函数中,最后的插入排序__final_insertion_sort。该函数再进行一次插入排序,由于小段之间都是有序的,因此该函数很快就能执行完。其代码如下:

1
2
3
4
5
6
7
8
9
10
template <class RandomAccessIterator>
void __final_insertion_sort(RandomAccessIterator first,
RandomAccessIterator last) {
if (last - first > __stl_threshold) {
__insertion_sort(first, first + __stl_threshold);
__unguarded_insertion_sort(first + __stl_threshold, last);
}
else
__insertion_sort(first, last);
}

该函数判断当前排序范围是不是小于等于于stl_threshold(16),如果是,直接进行优化的插入排序insertion_sort。否则,排序前面的16个元素,再调用unguarded_insertion_sort排序剩下的元素。unguarded_insertion_sort的相关定义代码如下:

1
2
3
4
5
6
7
8
9
10
11
12
template <class RandomAccessIterator>
inline void __unguarded_insertion_sort(RandomAccessIterator first,
RandomAccessIterator last) {
__unguarded_insertion_sort_aux(first, last, value_type(first));
}

template <class RandomAccessIterator, class T>
void __unguarded_insertion_sort_aux(RandomAccessIterator first,
RandomAccessIterator last, T*) {
for (RandomAccessIterator i = first; i != last; ++i)
__unguarded_linear_insert(i, T(*i));
}

__insertion_sort的相关代码如下:

1
2
3
4
5
6
7
8
9
10
11
12
13
14
15
16
17
18
19
20
21
22
23
24
25
26
27
28
29
30
31
32
template <class RandomAccessIterator>
void __insertion_sort(RandomAccessIterator first, RandomAccessIterator last) {
if (first == last) return;
for (RandomAccessIterator i = first + 1; i != last; ++i) // 外迴圈
__linear_insert(first, i, value_type(first)); // first,i形成一個子範圍
}

template <class RandomAccessIterator, class T>
inline void __linear_insert(RandomAccessIterator first,
RandomAccessIterator last, T*) {
T value = *last; // 記錄尾元素
if (value < *first) { // 尾比頭還小(那就別一個個比較了,一次做完…)
copy_backward(first, last, last + 1); // 將整個範圍向右遞移一個位置
*first = value; // 令頭元素等於原先的尾元素值
}
else
__unguarded_linear_insert(last, value);
}

template <class RandomAccessIterator, class T>
void __unguarded_linear_insert(RandomAccessIterator last, T value) {
RandomAccessIterator next = last;
--next;
// insertion sort 的內迴圈
// 注意,一旦不出現逆轉對(inversion),迴圈就可以結束了。
while (value < *next) { // 逆轉對(inversion)存在
*last = *next; // 轉正
last = next; // 調整迭代器
--next; // 前進一個位置
}
*last = value;
}

从上面的代码可以看出,关于插入排序的代码比sort其它部分的代码都要多,可见stl对插入排序进行了特别的优化,以使得其在处理接近有序数据的时候,速度非常快。从代码中可以看到,这些函数最终都调用了__unguarded_linear_insert函数,该函数优化了插入排序的实现。该函数的思路是从后往前找是否存在比value小的元素,如果还存在,就往后移动数据一个位置。最终,得到的是value需要插入的位置。根据stl源码剖析作者的说法,该函数不需要判断越界,因此提高了速度。在大数据量的排序中,优势很大。毕竟,该函数会被sort频繁调用。

关于插入排序代码实现的具体思路,参考stl源码剖析一书。本文的代码也取自该书提供的源码。

这里只讲解稀疏矩阵表示的线性系统。最新版本的eigen已经支持稀疏矩阵,以及相关操作了。eigen相对其它库的最大优势,默认情况下,只需要eigen的头文件即可,不需要其它依赖库,除非用对应的加速解法(需要更快的库支持)。所以,eigen就是个牛逼的模板矩阵库。虽然在使用的时候需要套用不少模板参数,有点麻烦。

eigen里面定义稀疏矩阵,然后加入数据的一种方式如下:

1
2
3
4
5
6
7
8
Eigen::SparseMatrix<float> smA(m_nRow, m_nColumn);

std::sort(m_pSI, m_pSI + m_nNum);//排序,列主序
for (int i = 0; i < m_nNum; ++i)// 初始化非零元素
{
smA.insert(m_pSI[i].r, m_pSI[i].c) = m_pSI[i].v;
}
smA.makeCompressed();

代码非常简单,makeCompressed是可选的,具体原因不怎么清楚,参考官方文档。
知道定义了稀疏矩阵之后,就可以解稀疏线性系统Ax=b了。A作为稀疏系数矩阵输入。eigen里面有多种解线性系统的方法,官方文档有说明。其中,QR分解适合于任何大小的稀疏矩阵A,并且被推荐用来解最小二乘法问题,适用范围很广。下面的是QR分解求线性系统的代码。

1
2
3
4
5
6
7
8
9
10
11
12
13
14
15
16
// 一个QR分解的实例
Eigen::SparseQR<Eigen::SparseMatrix<float>, Eigen::COLAMDOrdering<int>> linearSolver;
// 计算分解
linearSolver.compute(smA);

Eigen::VectorXf vecB(m_nRow);
for (int i = 0; i < m_nRow; ++i)
{
vecB[i] = pColumnB[i];
}
Eigen::VectorXf vecX = linearSolver.solve(vecB);// 求一个A*x = b

for (int i = 0; i < m_nColumn; ++i)
{
pX[i] = vecX[i];
}

代码的思路是先定义一个QR分解的线性solver,然后调用compute分解。再传入b,再调用solve函数求解,再传出数据。逻辑很简单。值得注意的是,这里用了float来计算,是因为qr分解比较耗内存,如果矩阵过大或者非0值过多就会计算不过来。因此,用float来减少一半内存,不过精度比double下降了,具体看实际需要选择float还是double。至于QR分解的原理,请参考维基百科等。
如果使用迭代的办法解线性方程组,该怎么用eigen实现了。eigen里面也提供了迭代的solver,不过要求稀疏矩阵A是方阵。那么,把A转换为方阵即可。Ax=b的两边同时乘以A的转置,得到A’Ax=A’b(A’是A的转置),再用迭代solver求解。如果得到的答案误差较大,可以在两边乘以个(-1)。如下代码所示。

1
2
3
4
5
6
7
8
9
10
11
12
13
14
15
16
17
18
19
20
21
22
23
24
25
26
27
28
29
30
31
32
33
34
35
36
37
38
39
40
//把A*X = b,转换为A'*A*X = A'*b,其中A'是A的转置,貌似计算结果不是很对,故没有使用该函数
int CSparseMatrix::SolveLinearSystemByEigenIterative(double* pColumnB, double* pX)
{
Eigen::SparseMatrix<float> smA(m_nRow, m_nColumn);

std::sort(m_pSI, m_pSI + m_nNum);//排序,列主序
for (int i = 0; i < m_nNum; ++i)//初始化非零元素
{
smA.insert(m_pSI[i].r, m_pSI[i].c) = m_pSI[i].v;
}

Eigen::SparseMatrix<float> smATranspose = smA.transpose();

Eigen::VectorXf vecB(m_nRow);
for (int i = 0; i < m_nRow; ++i)
{
vecB[i] = pColumnB[i];
}
vecB = smATranspose * vecB;//b = A'*b
vecB = (-1) * vecB;

smA = smATranspose * smA;//A = A'*A
smA = (-1) * smA;
smA.makeCompressed();
//std::cout << smA << std::endl;

Eigen::BiCGSTAB<Eigen::SparseMatrix<float>> linearSolver;
linearSolver.compute(smA);
Eigen::VectorXf vecX = linearSolver.solve(vecB);// 求一个A*x = b

std::cout << "#iterations: " << linearSolver.iterations() << std::endl;
std::cout << "estimated error: " << linearSolver.error() << std::endl;

for (int i = 0; i < m_nColumn; ++i)
{
pX[i] = vecX[i];
}

return 1;
}

迭代解法对应的头文件是#include “Eigen/IterativeLinearSolvers”。QR分解求线性系统的完整代码如下,相关定义很容易看懂。

1
2
3
4
5
6
7
8
9
10
11
12
13
14
15
16
17
18
19
20
21
22
23
24
25
26
27
28
29
30
31
32
33
//适合于解决最小二乘法问题
int CSparseMatrix::SolveLinearSystemByEigenQR(double* pColumnB, double* pX)
{
Eigen::SparseMatrix<float> smA(m_nRow, m_nColumn);

std::sort(m_pSI, m_pSI + m_nNum);//排序,列主序
for (int i = 0; i < m_nNum; ++i)// 初始化非零元素
{
smA.insert(m_pSI[i].r, m_pSI[i].c) = m_pSI[i].v;
}
smA.makeCompressed();

//std::cout << smA << std::endl;

// 一个QR分解的实例
Eigen::SparseQR<Eigen::SparseMatrix<float>, Eigen::COLAMDOrdering<int>> linearSolver;
// 计算分解
linearSolver.compute(smA);

Eigen::VectorXf vecB(m_nRow);
for (int i = 0; i < m_nRow; ++i)
{
vecB[i] = pColumnB[i];
}
Eigen::VectorXf vecX = linearSolver.solve(vecB);// 求一个A*x = b

for (int i = 0; i < m_nColumn; ++i)
{
pX[i] = vecX[i];
}

return 1;
}

QR分解对应的头文件是#include “Eigen/SparseQR”。</pre>

以前写过一篇C++调用MATLAB引擎计算特征向量,里面讲了如何配置环境等等。现在又有一个新的需求,求解线性系统。又想起了MATLAB这个工具,于是又写了个小类。这里要求解的是AX=B。其中,A是m*n的矩阵,X是n维行向量,B是m维列向量。MATLAB里面求解很简单X=A\B。

该类的头文件如下:

1
2
3
4
5
6
7
8
9
10
11
12
13
14
15
16
17
18
//求解线性系统AX = B.
//A是Row*Column的矩阵,B是Row*1的列向量
class CLinearSystem
{
public:
CLinearSystem() {}
CLinearSystem(double* pMatrixA, int nRow, int nColumn, double* pColumnB);
~CLinearSystem() {}

public:
void GetResult(double* pX);//pX保证能输出m_nColumn个元素

private:
double* m_pMatrixA;
double* m_pColumnB;
int m_nRow;
int m_nColumn;
};

源文件如下:

1
2
3
4
5
6
7
8
9
10
11
12
13
14
15
16
17
18
19
20
21
22
23
24
25
26
27
28
29
30
31
32
33
34
35
36
37
38
39
40
41
42
43
44
45
46
47
48
49
50
51
#include "stdafx.h"
#include "LinearSystem.h"
#include <cassert>
#include "engine.h"
#pragma comment(lib, "libeng.lib")
#pragma comment(lib, "libmx.lib")
#pragma comment(lib, "libmat.lib")

CLinearSystem::CLinearSystem(double* pMatrixA, int nRow, int nColumn, double* pColumnB)
: m_pMatrixA(pMatrixA), m_nRow(nRow), m_nColumn(nColumn), m_pColumnB(pColumnB)
{

}

void CLinearSystem::GetResult(double* pX)
{
assert(pX != NULL);

Engine *ep = NULL;
if (!(ep = engOpen(NULL)))//打开matlab引擎
{
fprintf(stderr, "\nCan't start MATLAB engine\n");
return;
}

mxArray* matrixA = mxCreateDoubleMatrix(m_nRow, m_nColumn, mxREAL);
//matlab里面的矩阵是列主顺序,这里需要变换位置
double* pA = mxGetPr(matrixA);
for (int j = 0; j < m_nColumn; ++j)
{
for (int i = 0; i < m_nRow; ++i)
{
*pA++ = *(m_pMatrixA + i * m_nColumn + j);
}
}

mxArray* columnB = mxCreateDoubleMatrix(m_nRow, 1, mxREAL);
memcpy(mxGetPr(columnB), m_pColumnB, sizeof(double) * m_nRow * 1);

engPutVariable(ep, "A", matrixA);
engPutVariable(ep, "B", columnB);
engEvalString(ep, "X = A\\B;");

mxArray* rowX = engGetVariable(ep, "X"); //返回计算结果
memcpy(pX, mxGetPr(rowX), sizeof(double) * m_nColumn);

mxDestroyArray(matrixA);
mxDestroyArray(columnB);
mxDestroyArray(rowX);
engClose(ep);
}

该类里面就一个计算结果的函数。实现的过程也很简单,打开MATLAB引擎,创建了对应的矩阵和向量,计算表达式。注意,”X = A\B;”中必须加转义\。另外,MATLAB中的矩阵是列主序的,也就是按照列存储的。所以,从C++的矩阵变换到MATLAB矩阵需要重新设置值,而不是简单的拷贝内存。
如果,A是巨大的稀疏矩阵,那么就应该创建稀疏矩阵来计算了。测试代码如下:

1
2
3
4
5
6
7
8
//测试线性系统
int nRow = 3, nColumn = 2;
double pA[3][2] = { {4, 5}, {1, 2}, {3, 1} };
double pB[3] = {3, 15, 12};
CLinearSystem ls((double*)pA, nRow, nColumn, pB);
double pX[2];
ls.GetResult(pX);
printf("%f %f\n", pX[0], pX[1]);

输出为:3.000000 -0.600000

前面说了,系数矩阵的事情,现在代码进行了更新,加入了稀疏矩阵,A可以是稀疏矩阵传入,B的话没有当做稀疏矩阵传入了。不过,在调用MATLAB代码时候还是得作为稀疏矩阵。具体代码如下,就不细说了。

1
2
3
4
5
6
7
8
9
10
11
12
13
14
15
16
17
18
19
20
21
22
23
24
25
26
27
28
29
30
31
32
33
34
35
36
37
38
39
40
41
42
43
44
45
46
47
48
49
50
51
52
53
54
55
56
57
58
59
60
61
62
63
64
65
66
67
68
69
70
71
72
73
74
75
76
77
78
79
80
81
82
83
84
85
86
87
88
89
90
91
92
93
94
95
96
97
98
99
100
101
102
103
104
105
106
107
108
109
110
111
112
113
114
115
116
117
118
119
120
121
122
123
124
125
126
127
128
129
130
131
132
133
134
135
136
137
138
139
140
141
142
143
144
145
146
147
148
149
150
151
152
153
154
155
156
#pragma once

#ifndef LIBYX_LINEAR_SYSTEM_H
#define LIBYX_LINEAR_SYSTEM_H

#include "MatlabSparseMatrix.h"

namespace LibYX
{
//求解线性系统AX = B.
//A是Row*Column的矩阵,B是Row*1的列向量
class CLinearSystem
{
public:
CLinearSystem() {}
CLinearSystem(double* pMatrixA, int nRow, int nColumn, double* pColumnB);
CLinearSystem(MatlabSparseInfor* pSI, int nNum, int nRow, int nColumn, double* pColumnB);
~CLinearSystem() {}

public:
void GetResult(double* pX);//pX保证能输出m_nColumn个元素
void GetResultSparse(double* pX);//中间过程使用稀疏矩阵计算结果

private:
double* m_pMatrixA;
double* m_pColumnB;
int m_nRow;
int m_nColumn;

private://稀疏矩阵形式输入A
MatlabSparseInfor* m_pSI;
int m_nNum;
};
};

#endif

#include "stdafx.h"
#include "LinearSystem.h"
#include <cassert>
#include "engine.h"
#pragma comment(lib, "libeng.lib")
#pragma comment(lib, "libmx.lib")
#pragma comment(lib, "libmat.lib")

namespace LibYX
{
CLinearSystem::CLinearSystem(double* pMatrixA, int nRow, int nColumn, double* pColumnB)
: m_pMatrixA(pMatrixA), m_nRow(nRow), m_nColumn(nColumn), m_pColumnB(pColumnB)
{

}

CLinearSystem::CLinearSystem(MatlabSparseInfor* pSI, int nNum, int nRow, int nColumn, double* pColumnB)
: m_pSI(pSI), m_nNum(nNum), m_nRow(nRow), m_nColumn(nColumn), m_pColumnB(pColumnB)
{

}

void CLinearSystem::GetResult(double* pX)
{
assert(pX != NULL);

Engine *ep = NULL;
if (!(ep = engOpen(NULL)))//打开matlab引擎
{
fprintf(stderr, "\nCan't start MATLAB engine\n");
return;
}

mxArray* matrixA = mxCreateDoubleMatrix(m_nRow, m_nColumn, mxREAL);
//matlab里面的矩阵是列主顺序,这里需要变换位置
double* pA = mxGetPr(matrixA);
for (int j = 0; j < m_nColumn; ++j)
{
for (int i = 0; i < m_nRow; ++i)
{
*pA++ = *(m_pMatrixA + i * m_nColumn + j);
}
}

mxArray* columnB = mxCreateDoubleMatrix(m_nRow, 1, mxREAL);
memcpy(mxGetPr(columnB), m_pColumnB, sizeof(double) * m_nRow * 1);

engPutVariable(ep, "A", matrixA);
engPutVariable(ep, "B", columnB);
engEvalString(ep, "X = A\\B;");

mxArray* rowX = engGetVariable(ep, "X"); //返回计算结果
memcpy(pX, mxGetPr(rowX), sizeof(double) * m_nColumn);

mxDestroyArray(matrixA);
mxDestroyArray(columnB);
mxDestroyArray(rowX);
engClose(ep);
}

void CLinearSystem::GetResultSparse(double* pX)
{
Engine *ep = NULL;
if (!(ep = engOpen(NULL)))//打开matlab引擎
{
fprintf(stderr, "\nCan't start MATLAB engine\n");
return;
}

//以下代码构造稀疏系数矩阵
mxArray* sm = mxCreateSparse(m_nRow, m_nColumn, m_nNum, mxREAL);
double* pr = mxGetPr(sm);
mwIndex* ir = mxGetIr(sm);
mwIndex* jc = mxGetJc(sm);

int k = 0;
int nLastC = -1;
for (int i = 0; i < m_nNum; ++i)
{
pr[i] = m_pSI[i].v;
ir[i] = m_pSI[i].r;

if (m_pSI[i].c != nLastC)
{
jc[k] = i;
nLastC = m_pSI[i].c;
++k;
}
}
jc[k] = m_nNum;

//以下代码构造稀疏列
mxArray* columnB = mxCreateSparse(m_nRow, 1, m_nRow, mxREAL);
pr = mxGetPr(columnB);
ir = mxGetIr(columnB);
jc = mxGetJc(columnB);

jc[0] = 0;
for (int i = 0; i < m_nRow; ++i)
{
pr[i] = m_pColumnB[i];
ir[i] = i;
}
jc[1] = m_nRow;

//将构造的稀疏矩阵传入MATLAB命令中
engPutVariable(ep, "sm", sm);
engPutVariable(ep, "columnB", columnB);
engEvalString(ep, "X = sm\\columnB;");

mxArray* rowX = engGetVariable(ep, "X"); //返回计算结果
memcpy(pX, mxGetPr(rowX), sizeof(double) * m_nColumn);

mxDestroyArray(rowX);
mxDestroyArray(columnB);
mxDestroyArray(sm);
engClose(ep);
}
};